How to Waterproof a Basement on the Outside
Work done on the outside of the home is what most people think of when they picture basement waterproofing.
It makes sense, even to someone that has never done or seen basement waterproofing work, that somehow sealing the basement on the outside would be the optimal way to keep water out and, in many instances, they’re right.
Of course, modern methods have developed to effectively waterproof a basement on the inside. Interior drain tile, for example, is a versatile approach to waterproofing that stops seepage from cracks in the basement floor and the joint between the wall and floor called the cove joint. Interior drain tile can even be used to manage seepage coming through a porous concrete wall or a masonry wall with cracked or deteriorated mortar joints.
Seeping wall cracks can be permanently repaired from the interior as well by injecting them with expanding polyurethane that seals the crack all the way to the outside soil and remains flexible after curing to prevent re-cracking from minor foundation movement.
There are, however, methods of basement waterproofing that can be done only on the exterior of a home’s foundation and they are the most effective ways of stopping seepage from certain sources.
Waterproofing a Basement on the Outside
One good reason for waterproofing a basement from the outside is that outside is where the water is. Water that enters a basement comes from the soil surrounding it, either below the foundation or around it.
Water absorbed by soil causes the soil to expand, to a degree depending on what kind of soil is involved. For example, the sandy soil that is common in northwest Indiana doesn’t expand much because the sand in the soil creates more openings between particles, which allow the water to drain through the soil better.
On the other hand, the clay soil that is common in much of the Midwest, especially around Chicago, is regarded as a highly expansive soil, one that allows very little drainage and absorbs lots of water. The particles of clay soil are smaller and more tightly compacted (as any Chicago-area homeowner knows who has tried to dig a hole in the yard) and the soil swells accordingly when saturated.
All this expansion and swelling creates pressure around the foundation and that pressure can essentially push water through any small opening – a crack, porous spot, unsealed utility opening – and create seepage in the basement.
Dealing with seepage caused by this lateral pressure from over-saturated soil usually requires an exterior method of basement waterproofing and can also be alleviated by exterior work that is not specifically waterproofing but related more to water management and keeping it away from the foundation.
So, how is basement waterproofing done on the outside?
Exterior Waterproofing Membrane — Sometimes a foundation wall just leaks. For example, a poured concrete foundation wall, the most common in modern residential construction, can have porous spots in the concrete that were caused during construction, either by the concrete not being thoroughly mixed, allowing aggregate or dry cement to form a pocket, or by insufficient vibration of the poured wall to remove trapped air. These porous spots can, over time, allow water to seep into the basement.
In a masonry wall, a common source of seepage is a crack or deterioration of mortar joints between masonry units. Mortar joints may crack because of minor foundation movement and deteriorate due to repeated movement or because of a faulty installation. The average wall can have hundreds of running feet of mortar joints and that means a huge expanse of potential seepage problems.
Also in masonry walls, the masonry units, particularly concrete block and brick may be porous enough to allow water to migrate through over time. Concrete block is especially vulnerable because water that seeps in through the outer side of the block can collect in the cavities and seep through the porous inner side.
Finally, a foundation wall of any construction may have water seep over the top edge of the wall, especially if the grade of the lawn outside is negative — sloping toward the house — or if decks, patios or other adjoining structures were built improperly.
The remedy for all of these problems is the same – install an exterior waterproofing membrane to create an impermeable water barrier on the outside of the foundation.
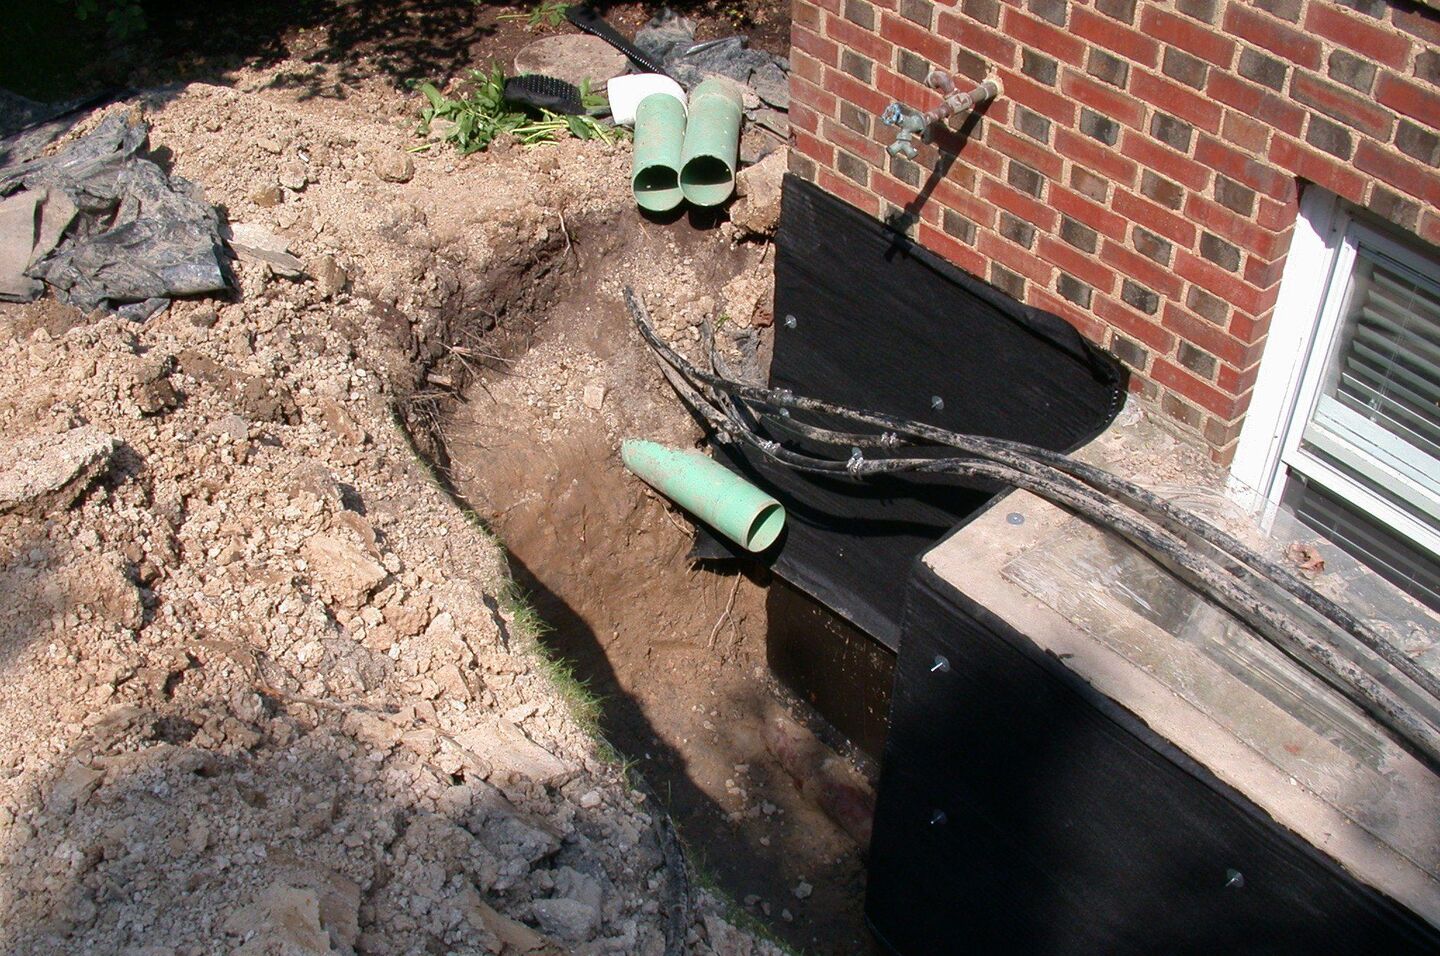
The first step in installing an exterior waterproofing membrane is to start digging. The foundation must be excavated down to the footings, which may be as deep as eight feet in a full basement. The excavation must also be several feet wide to allow room for technicians to work and it can range in length from just one affected wall to the entire perimeter of the house.
After the excavation is complete, the installation begins by cleaning soil and loose mortar or concrete from the wall. On a masonry wall made of stone or coarse brick, a parge coat of mortar is applied to even out the surface and is left to cure before work continues.
Once the wall has been prepped, the technicians use masonry trowels to apply a thick coating of asphalt-modified polyurethane. The dark color of the material often leads to it being misidentified as tar or roofing cement; it is a special sealant formulated for use below ground and neither of these materials is an adequate substitute.
When the membrane has cured it forms a seamless barrier around the foundation that not only keeps out water but can aid the structural integrity of the wall. Frequently, insulating material on a roll can be applied over the membrane as can be heavy-duty plastic drainage board. The drainage board will help to protect the membrane and will channel water downward. Any covering placed on the membrane is attached with clips that are set into the wall before the membrane is applied so that they are sealed in place.
The excavation is then backfilled and the foundation is permanently protected against seepage. There is, however, an addition to the exterior waterproofing membrane that can make it even more effective.
Exterior Drain Tile – When the ground water surrounding a foundation is extremely high, it benefits the homeowner to install exterior drain tile along with the membrane to alleviate pressure on the walls and drain off the water.
To install exterior drain tile after the membrane has been completed, a bed of washed gravel is laid at the bottom of the excavation. A system of perforated PVC pipe is then constructed to lay even with the footings the entire length of the excavation and is connected at one or both ends to a sump pump or allowed to drain to daylight. The pipe is normally encased in a “sock” of filtration fabric to keep dirt out of the system.
The pipe is then covered with more washed gravel and the excavation is backfilled. The drainage board mentioned above will help conduct water down to the drain tile and the homeowner will enjoy the benefits of a comprehensive and extremely effective exterior method of keeping his or her basement dry.
Installing an exterior waterproofing membrane and/or exterior drain tile is quite an undertaking but there is one other form of basement waterproofing that can be done quickly and effectively on the exterior.
Exterior Crack Repair – As noted earlier, foundations constructed of poured concrete are the most common variety found almost anywhere. The most common source of water seepage in a poured concrete foundation is a non-structural crack in the basement wall. Such cracks can be caused by the foundation settling or by the same lateral pressures that cause other forms of seepage.
Usually, these cracks are repaired on the interior of the basement by injecting them with expanding polyurethane. However, when the basement is finished or access to the crack is blocked by a furnace, water heater or other obstruction, the crack can also be repaired on the exterior.
Exterior crack repair begins by digging, too, but on a much smaller scale. A small-diameter hole is dug next to the foundation at the site of the crack. The hole extends all the way down to the foundation footings.
Once the excavation is complete, the hole is filled nearly to the top with a granular form of sodium bentonite clay. This granular clay will absorb water from the ground surrounding it, which will cause it to become plastic and form a pliable, permanent barrier against water that runs the length of the crack. The soil or sod is replaced and the repair is invisible.
Whether the source of the problem is a wall crack, bad mortar joint or patch of porous concrete, there is an exterior waterproofing solution that is made to order but only an experienced basement waterproofing contractor will be able to recommend and implement it. At U.S. Waterproofing, we got our start 57 years ago doing exterior waterproofing and have grown into one of the country’s largest full-service basement waterproofing companies with more than 300,00 satisfied customers on our books. Why not ask for our free advice when it looks like an exterior waterproofing solution is indicated for your home?